A Slice of Nostalgia: Butterfinger Cheesecake
There’s something undeniably magical about desserts that transport us back to childhood. The sweet, creamy goodness of Butterfinger Cheesecake does just that for me. I remember my sister and I, on warm summer days, raiding the pantry for our favorite candy bars, eagerly sharing bites of chocolaty, peanut buttery delight. With every crumb, we were reminded of the simple joys of life, where delicious treats were the hallmark of special moments.
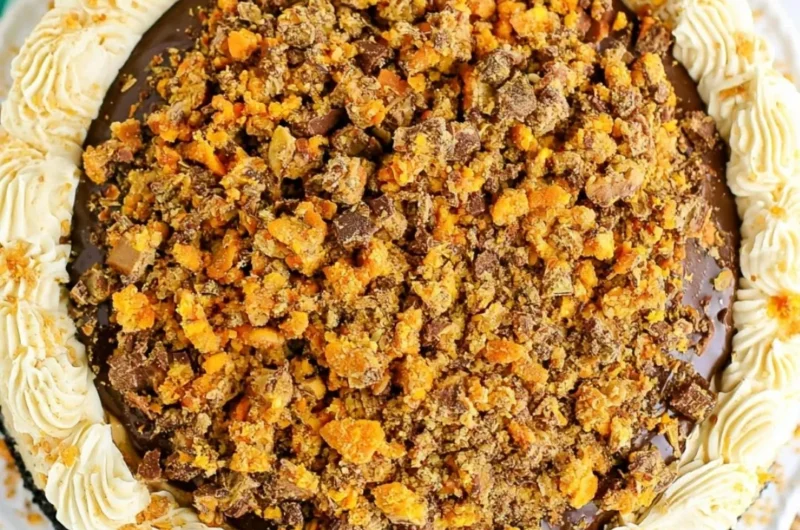
This dreamy Butterfinger Cheesecake will whisk you back to those sweet days, combining the richness of cream cheese with those iconic crunchy Butterfinger bits. Whether it’s a warm gathering or a cozy movie night in, this creamy fall dessert is sure to impress friends and family alike. It’s a treat you’ll treasure and want to pin for later!
Why You’ll Love This Recipe
- Indulgent Layers: Each slice of this cheesecake is a glorious blend of creamy, tangy flavors, complemented by the delightful crunch of crushed Butterfinger bars.
- Easy to Make: With straightforward instructions, this cheesecake is perfect for bakers of all skill levels, making it a fantastic option for an easy weeknight dessert.
- Crowd-Pleasing Delight: This dessert is a guaranteed hit at parties and gatherings! Everyone will be reaching for that extra slice.
- Family-Friendly Fun: The combination of chocolate and peanut butter is always a favorite among kids and adults alike.
- Make-Ahead Magic: This cheesecake can be made a day or two in advance, allowing the flavors to meld beautifully, making entertaining a breeze.
Ingredients You’ll Need for Butterfinger Cheesecake
Gather your favorite apron and let’s dive into the delightful ingredients you’ll need for this recipe:
- 2 1/4 cups (302g) Oreo crumbs
- 4 tbsp (56g) salted butter, melted
- 24 ounces (678g) cream cheese, room temperature
- 1 cup (207g) sugar
- 3 tbsp (24g) all-purpose flour
- 3/4 cup (173g) sour cream, room temperature
- 1/2 cup (140g) peanut butter
- 1 tsp vanilla extract
- 4 large eggs, room temperature
- 1 1/2 cups (12 fun-sized bars) chopped Butterfingers
- 6 oz semi-sweet chocolate chips
- 1/2 cup heavy whipping cream (for chocolate ganache)
- 3/4 cup heavy whipping cream (for whipped topping)
- 1/2 cup (58g) powdered sugar
- 2 tbsp (35g) peanut butter (for whipped topping)
- 1/4 tsp vanilla extract (for whipped topping)
- Chopped Butterfingers (for decoration)
Step-by-Step Instructions
Let’s Make It Together! Here’s how to create this delectable Butterfinger Cheesecake:
Prepare the Crust: Preheat your oven to 350°F (175°C). In a bowl, combine the Oreo crumbs and melted butter until it resembles wet sand. Press this mixture firmly into the bottom of a 9-inch springform pan. Bake for about 10 minutes until set. Let it cool.
Make the Cheesecake Filling: In a large mixing bowl, beat the cream cheese and sugar on medium speed until smooth. Gradually add the flour, sour cream, peanut butter, and vanilla extract. Beat until combined and creamy, scraping down the sides as needed.
Add the Eggs: Add the eggs one at a time, mixing just until combined after each addition. Be careful not to overmix, as this can lead to cracks in your cheesecake.
Fold in Butterfingers: Gently fold in the chopped Butterfingers into the cheesecake batter. Pour the mixture over the cooled crust and smooth the top.
Bake the Cheesecake: Bake in the preheated oven for 55-60 minutes, or until the center is slightly jiggly but mostly set. Turn off the oven and crack the door open, letting the cheesecake cool slowly for about an hour. This helps prevent cracking.
Chill: Cover the cheesecake with plastic wrap and refrigerate for at least 4 hours, preferably overnight to allow the flavors to deepen.
Prepare Chocolate Ganache: In a small saucepan over low heat, combine the heavy whipping cream and chocolate chips, stirring until melted and smooth. Allow it to cool slightly before drizzling over the cheesecake.
Make the Whipped Topping: In a mixing bowl, whip 3/4 cup of heavy whipping cream with powdered sugar, 2 tablespoons peanut butter, and 1/4 teaspoon vanilla until soft peaks form. Spread over the cooled cheesecake and drizzle with chocolate ganache. Top with chopped Butterfingers.
Delicious Variations to Try
Looking to add your unique twist? Here are some delicious variations you could play around with:
- Chocolate Chip Cookie Base: Swap the Oreo crust for a chocolate chip cookie crust for an extra indulgent base.
- Peanut Butter Swirl: Before baking, swirl in a few extra tablespoons of peanut butter for that extra richness in every bite.
- Drizzle Delight: Instead of chocolate ganache, use a caramel sauce drizzle for a sweet treat that evokes warm, cozy feelings.
- Mini Cheesecakes: For a fun twist, make individual mini cheesecakes in muffin tins for easier serving at gatherings.
Chef Emma’s Helpful Tips
Here are my best kitchen secrets to ensure your Butterfinger Cheesecake turns out perfectly every time:
- Room Temperature Ingredients: Ensure all your ingredients are at room temperature, especially eggs and cream cheese. This helps create a smooth batter without lumps.
- Avoid Cracking: Bake your cheesecake in a water bath. Wrap the bottom of your springform pan in foil and place it in a larger pan filled with hot water to maintain moisture.
- Storage: This cheesecake can be stored in the refrigerator for up to a week. Just cover the top to keep it fresh.
- Make-Ahead: They keep well for up to three days in the fridge, making them a perfect make-ahead dessert for stress-free entertaining.
What’s Inside – Nutrition Breakdown
This recipe yields about 12 servings. Here’s a quick nutrition breakdown per slice:
- Serving Size: 1 slice
- Calories: 410
- Total Fat: 30g
- Carbohydrates: 32g
- Sugar: 23g
- Protein: 6g
- Sodium: 210mg
Frequently Asked Questions
Can I make this ahead?
Absolutely! This cheesecake is best when made a day ahead, giving it time to chill and set up nicely.
Can I use different ingredients?
Sure! Feel free to experiment with different types of chocolate or even different candy bars for a unique flavor.
How do I store leftovers?
Store any leftovers in the fridge, covered with plastic wrap or in an airtight container, for up to a week.
How long does it last?
This cheesecake will last in the refrigerator for about a week, but trust me, it’s going to disappear before that!
A Cozy Closing Note
There you have it, my dear friends—an inviting, creamy Butterfinger Cheesecake that brings sweetness and warmth to any occasion. Each bite is a wonderful mix of nostalgia and decadent joy, perfect for sharing with loved ones or savoring on your own.
Save this Butterfinger Cheesecake to your cozy dessert board so it’s ready when you need a comfortable treat! Happy baking!
Print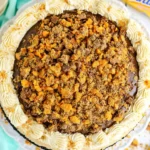
Butterfinger Cheesecake
- Total Time: 85 minutes
- Yield: 12 servings 1x
- Diet: Vegetarian
Description
This dreamy Butterfinger Cheesecake combines rich cream cheese with crunchy Butterfinger bits, transporting you back to nostalgic childhood moments.
Ingredients
- 2 1/4 cups (302g) Oreo crumbs
- 4 tbsp (56g) salted butter, melted
- 24 ounces (678g) cream cheese, room temperature
- 1 cup (207g) sugar
- 3 tbsp (24g) all-purpose flour
- 3/4 cup (173g) sour cream, room temperature
- 1/2 cup (140g) peanut butter
- 1 tsp vanilla extract
- 4 large eggs, room temperature
- 1 1/2 cups (12 fun-sized bars) chopped Butterfingers
- 6 oz semi-sweet chocolate chips
- 1/2 cup heavy whipping cream (for chocolate ganache)
- 3/4 cup heavy whipping cream (for whipped topping)
- 1/2 cup (58g) powdered sugar
- 2 tbsp (35g) peanut butter (for whipped topping)
- 1/4 tsp vanilla extract (for whipped topping)
- Chopped Butterfingers (for decoration)
Instructions
- Preheat your oven to 350°F (175°C). In a bowl, combine the Oreo crumbs and melted butter until it resembles wet sand. Press this mixture firmly into the bottom of a 9-inch springform pan. Bake for about 10 minutes until set. Let it cool.
- In a large mixing bowl, beat the cream cheese and sugar on medium speed until smooth. Gradually add the flour, sour cream, peanut butter, and vanilla extract. Beat until combined and creamy, scraping down the sides as needed.
- Add the eggs one at a time, mixing just until combined after each addition. Be careful not to overmix, as this can lead to cracks in your cheesecake.
- Gently fold in the chopped Butterfingers into the cheesecake batter. Pour the mixture over the cooled crust and smooth the top.
- Bake in the preheated oven for 55-60 minutes, or until the center is slightly jiggly but mostly set. Turn off the oven and crack the door open, letting the cheesecake cool slowly for about an hour. This helps prevent cracking.
- Cover the cheesecake with plastic wrap and refrigerate for at least 4 hours, preferably overnight to allow the flavors to deepen.
- In a small saucepan over low heat, combine the heavy whipping cream and chocolate chips, stirring until melted and smooth. Allow it to cool slightly before drizzling over the cheesecake.
- In a mixing bowl, whip 3/4 cup of heavy whipping cream with powdered sugar, 2 tablespoons peanut butter, and 1/4 teaspoon vanilla until soft peaks form. Spread over the cooled cheesecake and drizzle with chocolate ganache. Top with chopped Butterfingers.
Notes
Ensure all ingredients are at room temperature for a smooth batter. A water bath during baking can help prevent cracking.
- Prep Time: 15 minutes
- Cook Time: 70 minutes
- Category: Dessert
- Method: Baking
- Cuisine: American
Nutrition
- Serving Size: 1 slice
- Calories: 410
- Sugar: 23g
- Sodium: 210mg
- Fat: 30g
- Saturated Fat: 15g
- Unsaturated Fat: 12g
- Trans Fat: 0g
- Carbohydrates: 32g
- Fiber: 1g
- Protein: 6g
- Cholesterol: 130mg